WebsiteBuilder: How to Add or Delete a Section
How To Add A Section
- Log in to your Domains Dashboard.

- On the dashboard, select the domain where your WebsiteBuilder is situated.
There are two views in the Domains dashboard - the Card and List views. Click on the view icons to switch to your preferred view.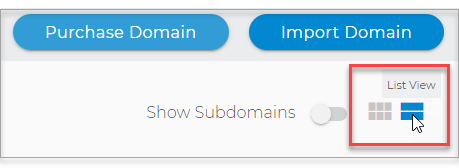
- Choose the domain you wish to modify.
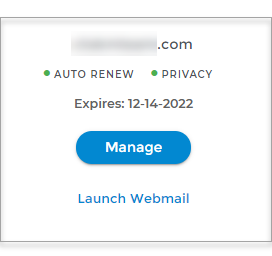
In the Card view, click the domain's Manage button.
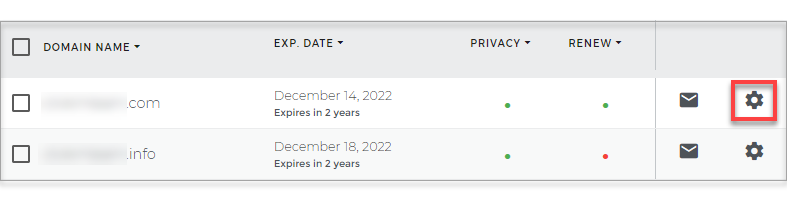
In List view, click the domain or its gear icon on the right-hand side.
-
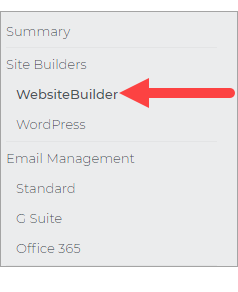
On the left pane, click on WebsiteBuilder, under Site Builders.
-
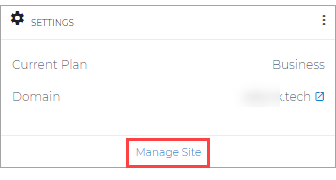
Under Settings, click Manage Site. This action will open your WebsiteBuilder screen on a new tab.
-
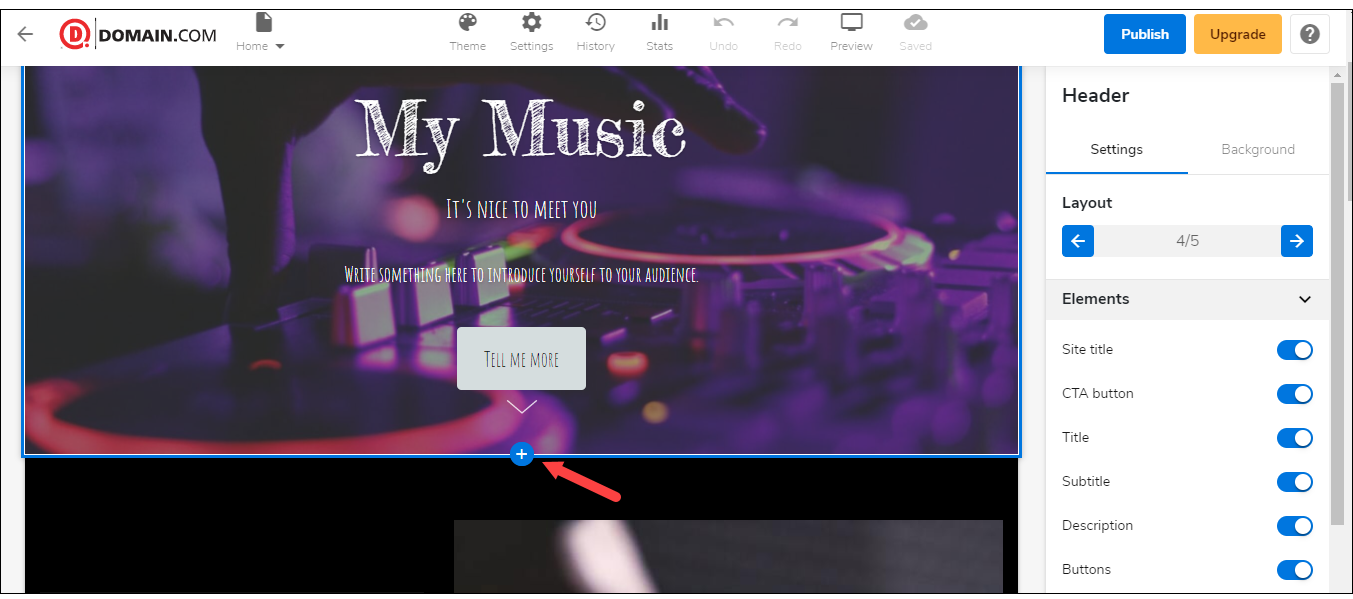
Scroll down and look for the Plus sign between the sections of your existing posts.
-
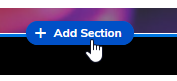
Once found, hover your mouse pointer over it and click Add Section.
-
From the list of categories on the left pane, select a section type that would suit your content.
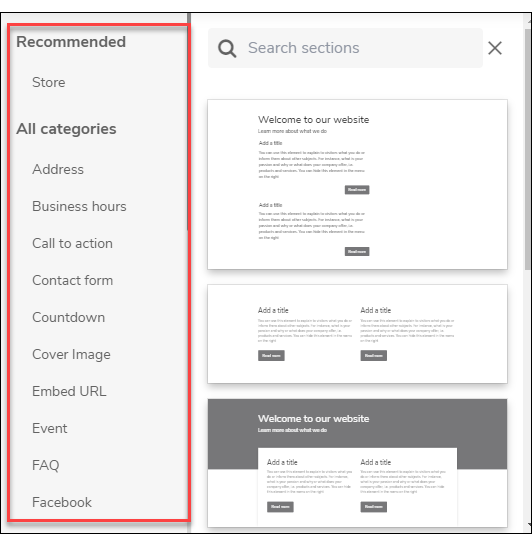
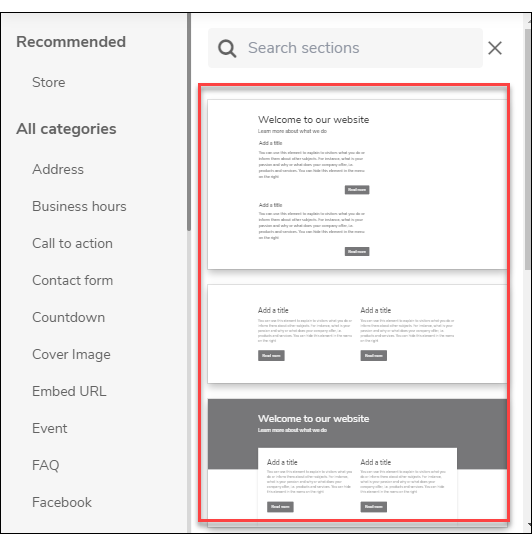
- Select a layout.
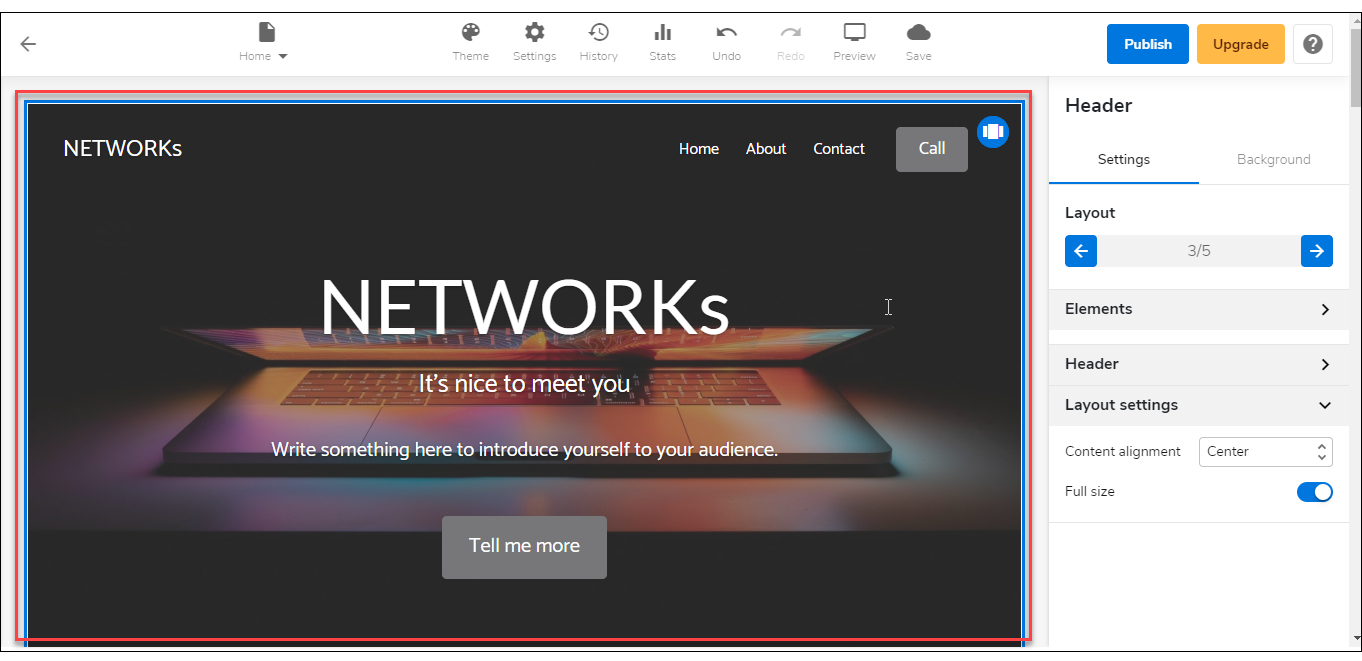
- Don't forget to save your work by clicking the Save icon. Once saved, click on the Publish button on the upper part of your editor screen. Remember that changes are only visible after you have saved and published your work.

How To Delete A Section
-
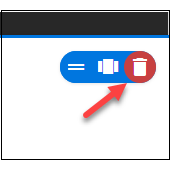
Click on the section that you want to remove.
-
Click the Delete icon in the upper right corner.