WebsiteBuilder: How to Add Links and Documents
NOTE: We offer two different versions of WebsiteBuilder. Our original implementation of the builder is the Legacy WebsiteBuilder Editor, while WebsiteBuilder Express Editor is the newest interface commonly found in the Foundation dashboard. It is not possible to upgrade a Legacy WebsiteBuilder site to the Express Editor. The site will need to be recreated with the Express Editor. All new WebsiteBuilder installations will be the Express Editor.
In this article, we have provided two sets of instructions for each editor. Follow the instruction set that matches your WebsiteBuilder version.
How to check if I have Legacy WebsiteBuilder Editor or Express Editor?
| Legacy WebsiteBuilder | WebsiteBuilder Express Editor |
 |
 |
Note: You can add files like .pdf, .doc, .txt as a link to any of your website content.
Legacy WebsiteBuilder Editor: How to Add Links and Documents
WebsiteBuilder Express Editor: How to Add Links and Documents
How to launch WebsiteBuilder
- Log in to your Domains Dashboard.

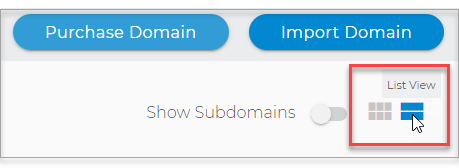
- There are two views in the Domains dashboard - the Card and List views. Click on the view icons to switch to your preferred view.
- Choose the domain where you have your WebsiteBuilder configured.
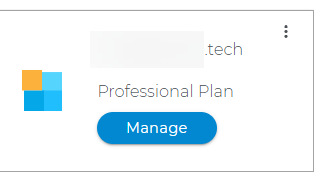
In the Card view, click the domain's Manage button.
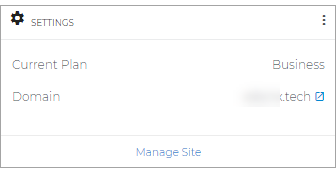
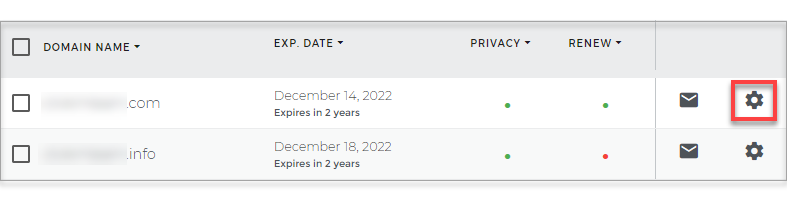
In List view, click the domain or its gear icon on the right-hand side.
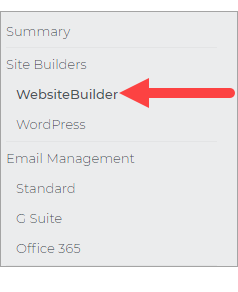
- On the left pane, click WebsiteBuilder, under Site Builders.
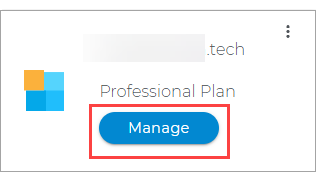
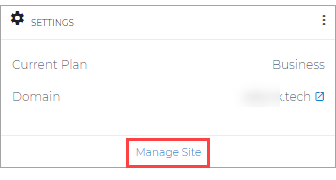
- Click Manage / Manage Site. This action will open your WebsiteBuilder screen in a new tab.
Legacy WebsiteBuilder WebsiteBuilder Express Editor
Back to top.
Legacy WebsiteBuilder Editor: How to Add Links
-
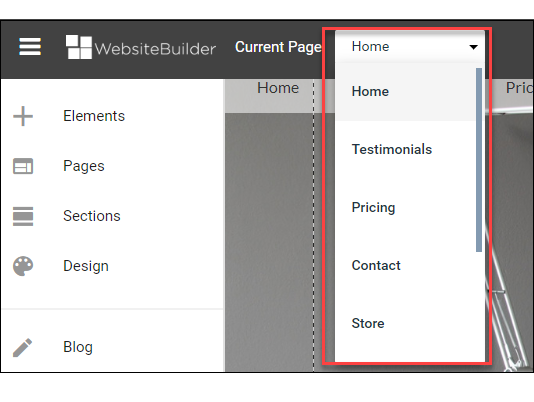
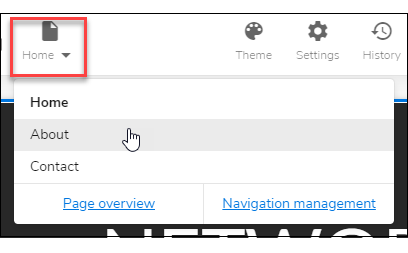
Select the page where you want to add links using the page selector drop-down menu.
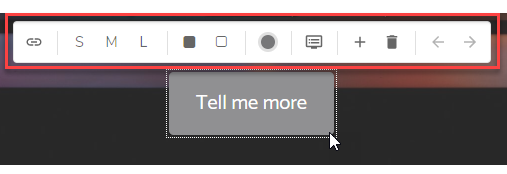
- Select the element where you would like to add a link. A menu bar will appear above it, then click Attach Link.
For buttons:
For shapes and images: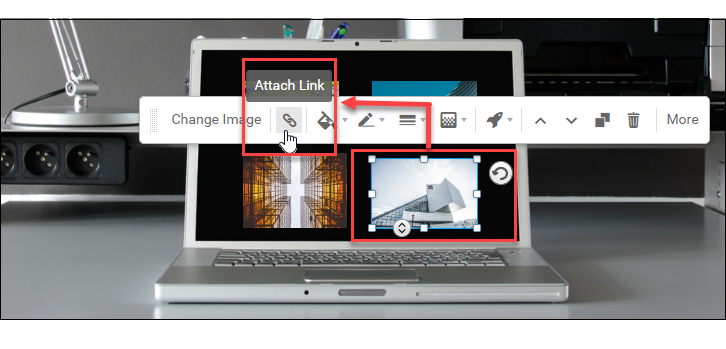
For text elements:
a. Click on the text box, then click More. You can also select a word or group of words to attach the link to.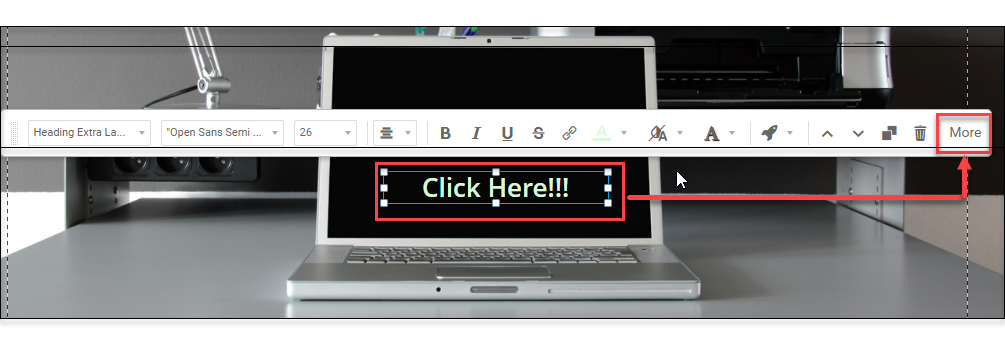
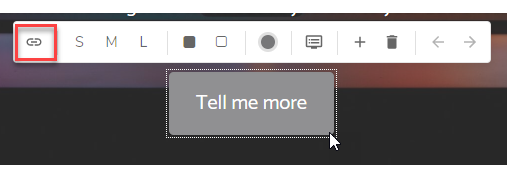
b. Click the Attach link icon.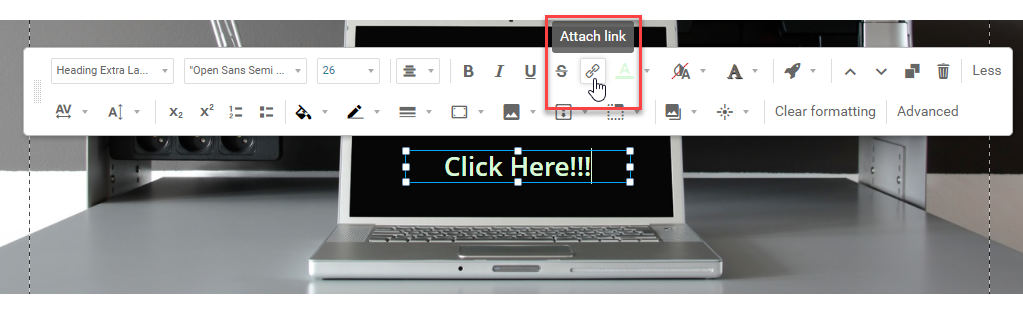
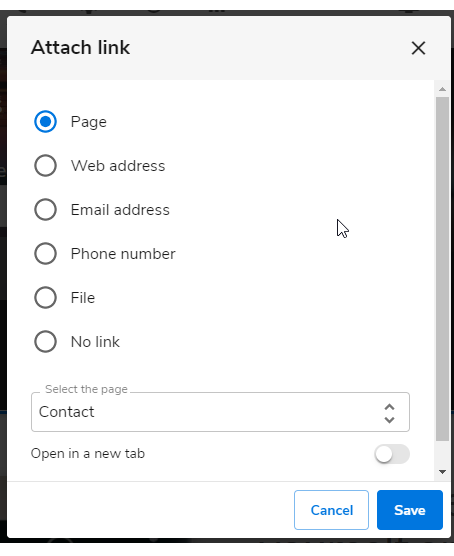
- The Attach link window will pop-up.
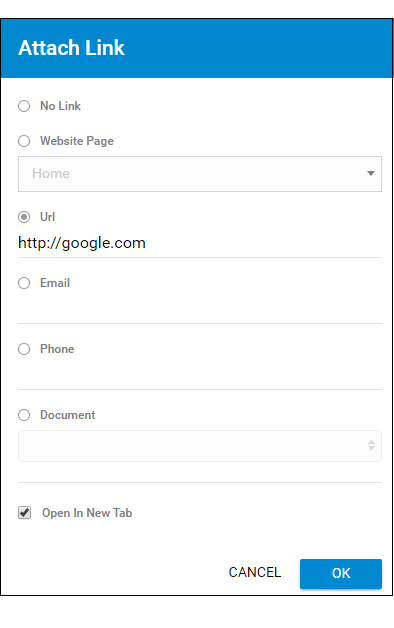
From here, you can either link a page, web address, email address, phone number, or file. If you select:
Page: It will let you link to any page on the site you are currently working on.
Web address: It will let you add a link to any site on the web.
Email address: It will open the user’s email client and automatically input the recipient's email address. It also has an option to enter the subject line that you would like prefilled when they click the button.
Phone number: When on a mobile device, the phone link will open their phone app and add the entered number into the dialer.
File: it allows you to upload a PDF file that can be downloaded by users when clicked.
- Remember to save your work by clicking the Save icon. After saving, click the Publish button on the upper part of your editor screen. Changes are only visible after you have saved and published your work.

Back to top.
WebsiteBuilder Express Editor: How to Add Links
-
Select the page where you want to add links using the page selector drop-down menu.
- Select the text, image, or button you would like to add the link to. A menu bar will appear above it.
- Click the Attach link icon.
- The Attach link window will pop-up.
- Page: It will let you link to any page on the site you are currently working on.
- Web address: It will let you add a link to any site on the web.
- Email address: It will open the user’s email client and automatically input the recipient's email address. It also has an option to enter the subject line that you would like prefilled when they click the button.
- Phone number: When on a mobile device, the phone link will open their phone app and add the entered number into the dialer.
- File: it allows you to upload a PDF file that can be downloaded by users when clicked.

