WebsiteBuilder: How to Add Digital Products to Your Store
There are varieties of products that you can post in your store. It is not limited only to physical items, but digital products are also welcome. Follow the instructions that match your WebsiteBuilder version to know how to add digital products to your store.
NOTE: We offer two different versions of WebsiteBuilder. Our original implementation of the builder is the Legacy Websitebuilder Editor, while WebsiteBuilder Express Editor is the newest interface commonly found in the Foundation dashboard. It is not possible to upgrade a Legacy Websitebuilder site to the Express Editor. The site will need to be recreated with the Express Editor. All new WebsiteBuilder installations will be the Express Editor.
How to check if I have Legacy Websitebuilder Editor or Express Editor?
| Legacy Websitebuilder | WebsiteBuilder Express Editor |
 |
 |
How to launch WebsiteBuilder
How to Add Digital Products in Legacy Websitebuilder Editor
How to Add Digital Products in Express Editor
How to launch WebsiteBuilder?
- Log in to your Domains Dashboard.

- On the dashboard, select the domain where your WebsiteBuilder is situated.
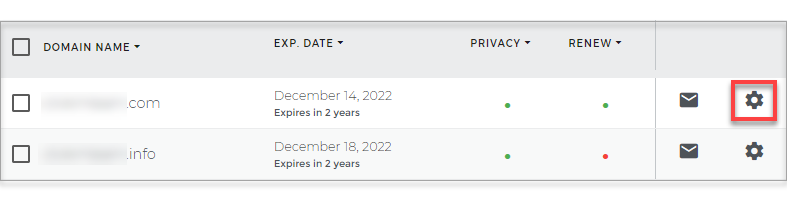
There are two views in the Domains dashboard - the Card and List views. Click on the view icons to switch to your preferred view.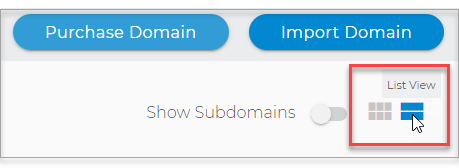
- Choose the domain you wish to modify.
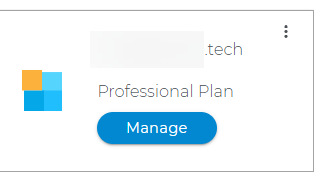
In the Card view, click the domain's Manage button.
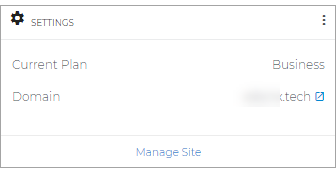
In List view, click the domain or its gear icon on the right-hand side.
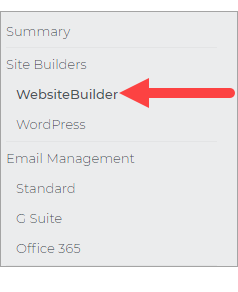
- Click on WebsiteBuilder on the left pane.
Legacy Websitebuilder: How to Add Digital Products?
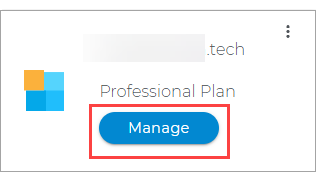
- To launch your Legacy Websitebuilder Editor, click Manage.
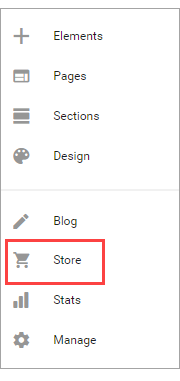
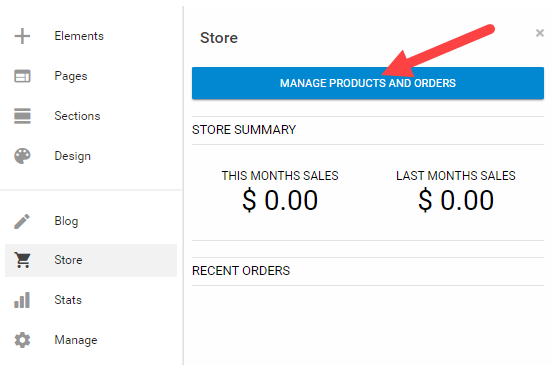
- Once you are in, click on the Store Section on the left menu.
- Then hit Manage Products and Orders.
- On the left menu of the Manage Store page, click Products. Hover your mouse to the Add Button on the bottom right, then click Add.

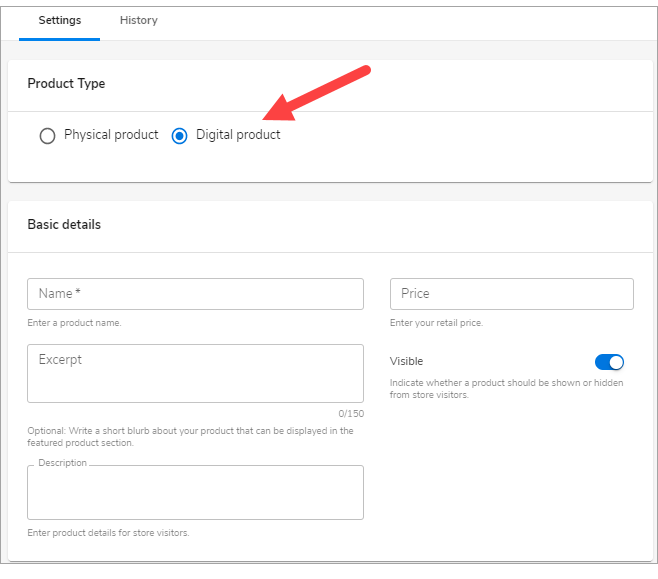
- Inside the Add product page, select Digital Product. Provide all the basic details of the digital product.
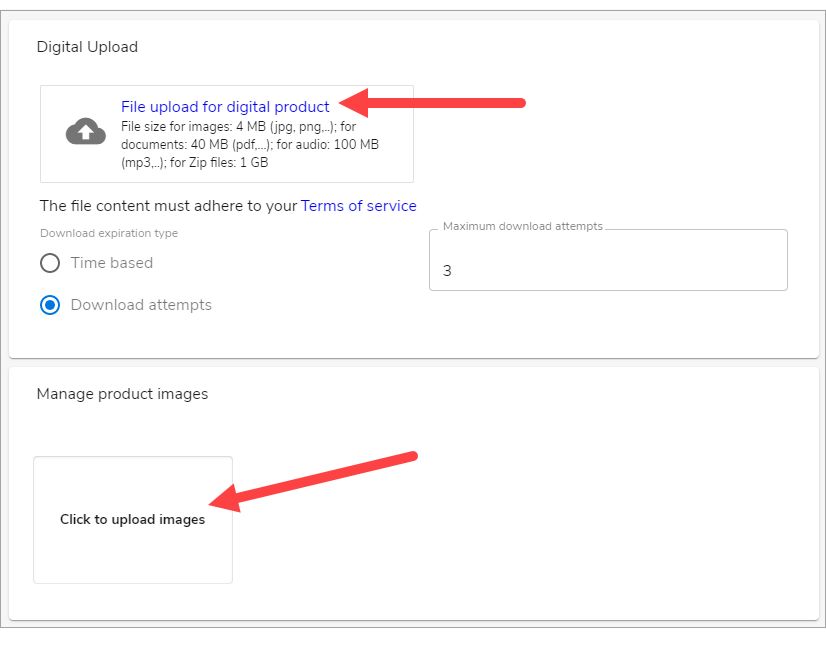
- Click File upload for a digital product to upload the product and upload an image for it.
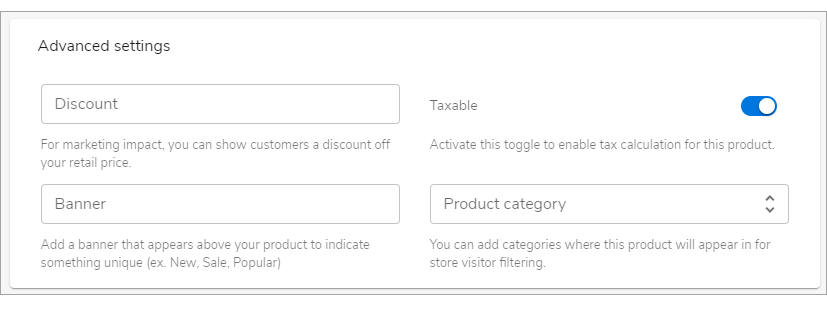
- You can also adjust the Advanced Settings at the bottom of the screen like discount, banner, product category, and determine whether the product is taxable.

- Once you added the Digital Products Specifications, click on Publish on the upper right hand. Then click on Back to Editor.

- Once done, click the Save button in the top section of your editor. And once that you are ready to make changes public, hit Publish. Note that by saving changes, it will not appear on the live website until you publish changes.

WebsiteBuilder Express Editor: How to Add Digital Products?
-
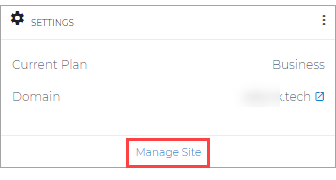
To launch your WebsiteBuilder Editor, click Manage Site.
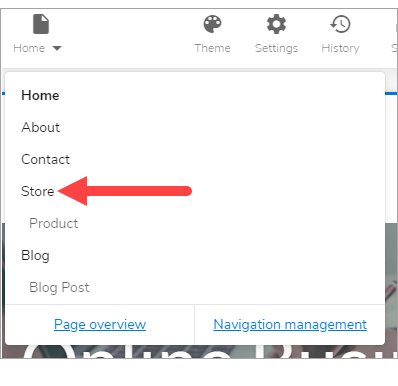
- On the top section of your editor screen, look for the drop-down of pages, then click Store.
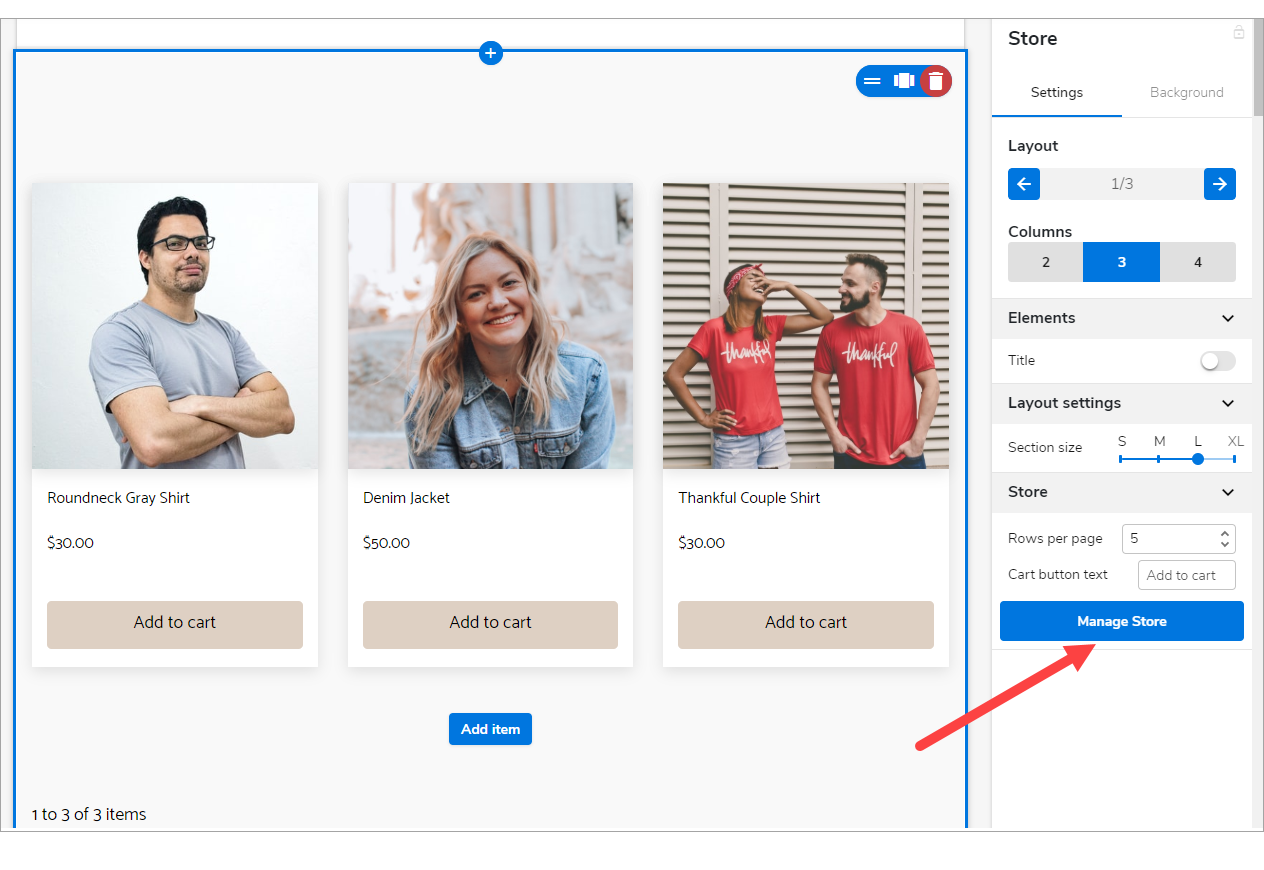
- Hover your mouse to one of the sections and notice that several options will slide on the right pane. Look for Manage Store.
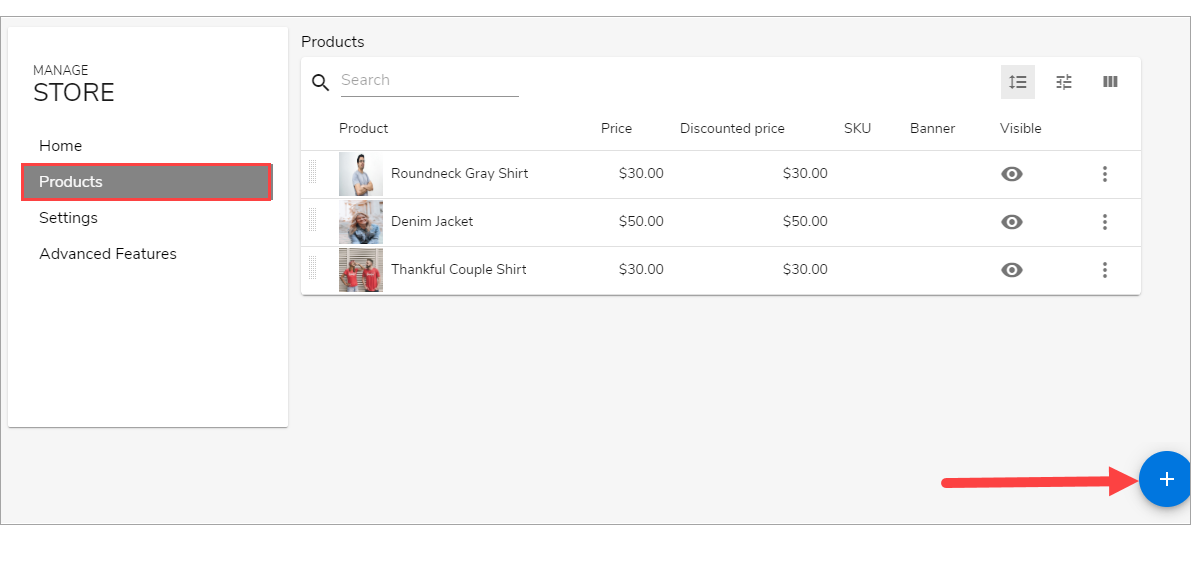
- On the left menu of the Manage Store page, click Products. Hover your mouse to the Add Button on the bottom right, then click Add.
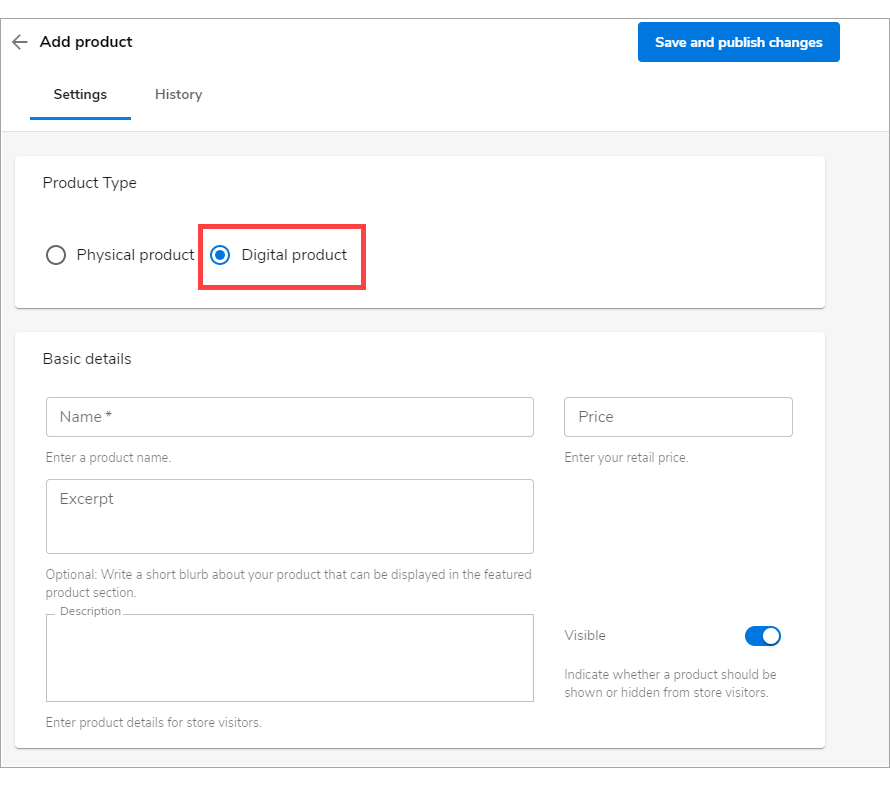
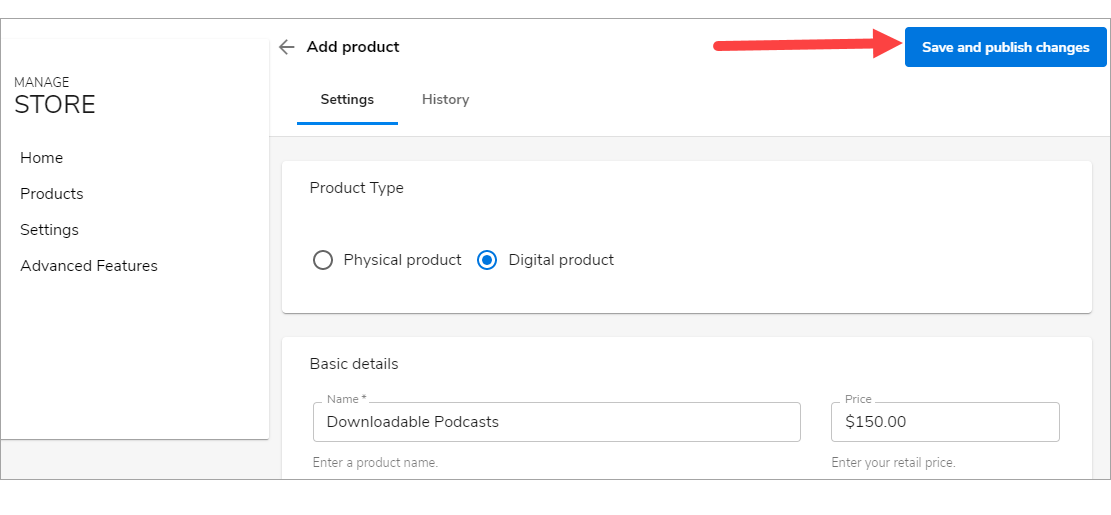
- Inside the Add product page, select Digital Product. Provide all the basic details of the digital product.
- Click File upload for a digital product to upload the product and upload an image for it.

- You can also adjust the Advanced Settings at the bottom of the screen like discount, banner, product category, and determine whether the product is taxable.
- Once set, scroll to the top, then click Save and publish changes. It will display all the products and their information.
- Then, on the upper left corner of the Manage Store page, click Back to Editor.
- Once done, click the Save button in the top section of your editor. And once that you are ready to make changes public, hit Publish. Note that by saving changes, it will not appear on the live website until you publish changes.

