Email Client Setup: Windows 10 Mail App
This article will explain how to set up an email account in the Windows 10 mail application.If you have a Windows 10 PC, it has the Windows Mail App installed by default that you can use to configure your email accounts. The Mail App is also on Windows 8 and its variants, and you can use this article to configure your Email Account on Windows 8.
You will need your incoming mail server, outgoing mail server, full email address, and your email password. The default settings are listed below.
Non-SSL Settings
| Outbound Server SMTP | smtp.ipage.com | Port 587 |
| Inbound Server IMAP | imap.ipage.com | Port 143 |
| Inbound Server POP | pop.ipage.com | Port 110 |
With SSL Settings
| Outbound Server SMTP | smtp.ipage.com | Port 465 |
| Inbound Server IMAP | imap.ipage.com | Port 993 |
| Inbound Server POP | pop.ipage.com | Port 995 |
We can always provide our server settings and walk you through setting up your Windows 10 Mail App. However, we cannot help troubleshoot errors specific to Windows.
Setting Up Windows 10 Mail App
NOTE: In the example below, we will be configuring the email account using SSL Hostnames for SMTP and IMAP protocols.
Step 1: Launch the Windows 10 Mail App. On the left, you will see an option called Accounts. Click on it, and a new column will slide in on the right.
Click on Add Account.
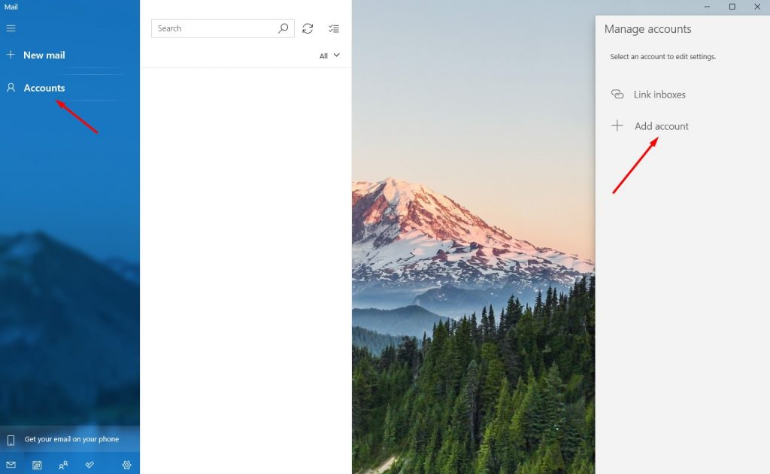
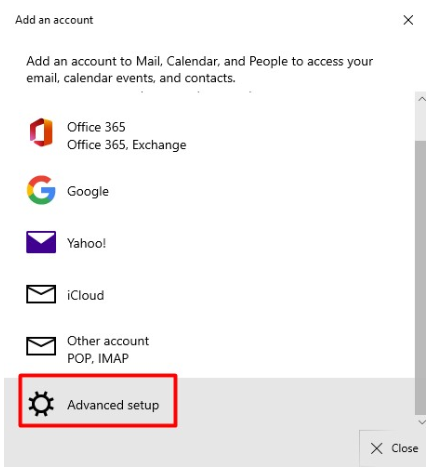
Step 2: Select Advanced setup.
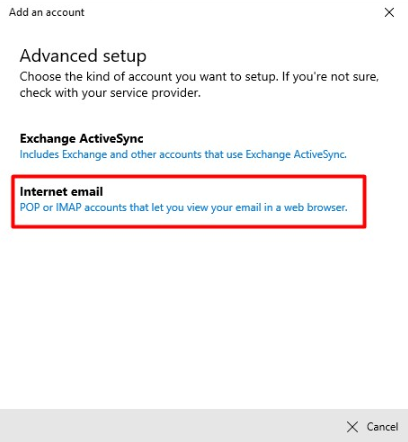
Step 3: Select Internet email.
Step 4: Refer to the Email Client Settings above, and based on your preferences, enter the respective hostnames, port numbers, and encryption methods for the Incoming Mail and Outgoing Mail servers.
NOTE: Uncheck the box that reads “Require SSL for outgoing email.”
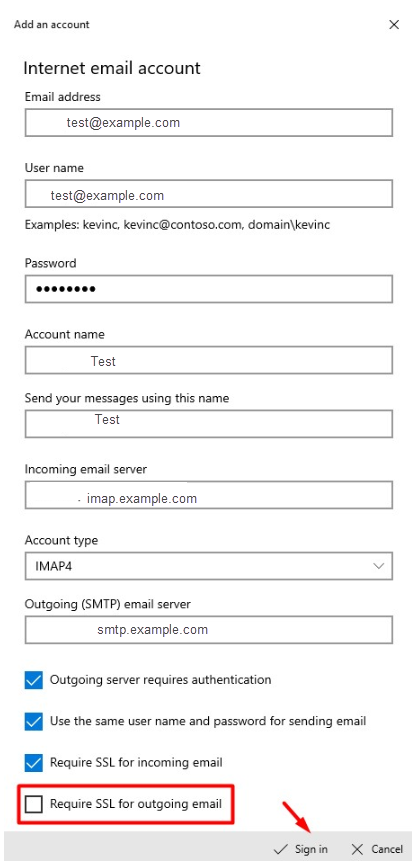
Note: The provided details on the image above are just examples only. Please use your own details and refer to the settings provided above.
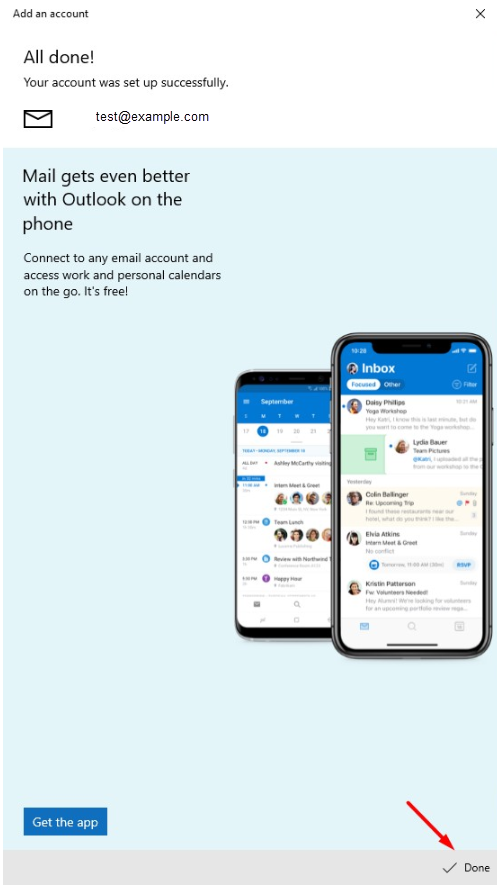
Step 5: Your email account has been configured successfully!
Click on Done to conclude the process.
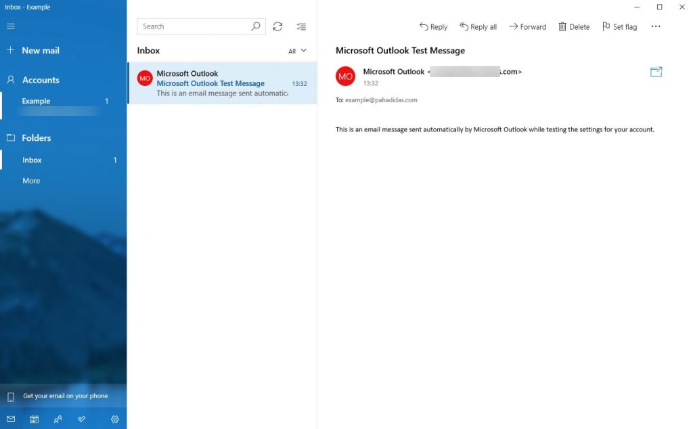
Step 6: You can now send and receive emails on your Email Client.
I followed the instructions, but I still can't connect. What can I do?
- Refer to the generic troubleshooting steps for email client setup.
- Consult Microsoft's support page for Windows 10 Mail App.
- Contact us so that we can help you troubleshoot the issue.

 No matter what your budget is or how little time you have, you can reach new customers and grow your business using Google Ads. See results and gain new customers in minutes!