How to Update TXT and SPF Records - DNS Management
Sender Policy Framework and the related TXT files are used to verify domain ownership and implement email security measures to reduce spam and domain spoofing. It is a DNS record that provides text information to sources outside the domain that can be used for several purposes. The record's value can be either human- or machine-readable text.
Sample SPF record:
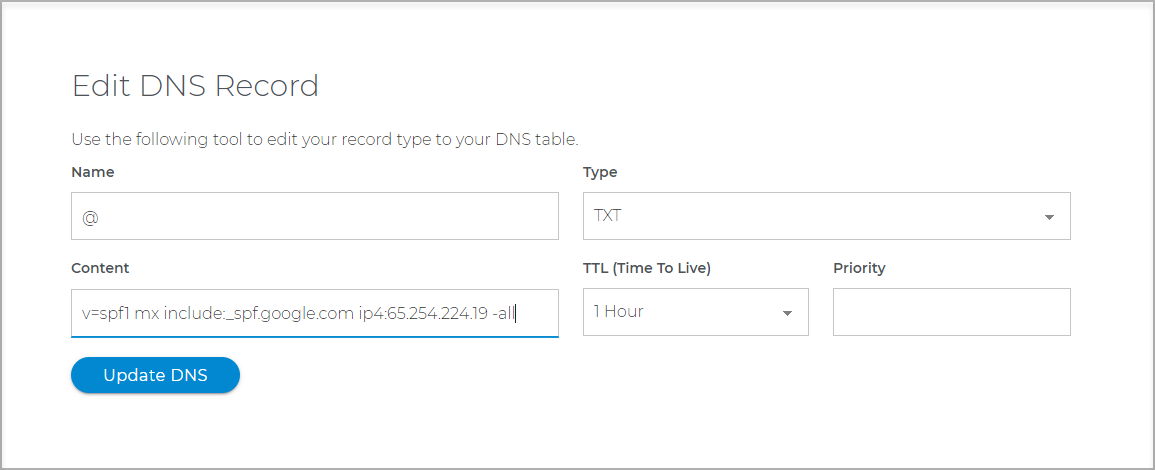
v=spf1 mx include:_spf.google.com ip4:65.254.224.19 -all
| v=spf1 | mx | include | ip4:66.96.128.0 | -all |
|---|---|---|---|---|
| Sets the SPF version being used. | Allows the domain’s MX details to send an email. | Includes Google mail servers as authorized servers. | This IP address will pass. | Any other IP address will fail. |
SPF vs TXT
An SPF TXT record is a DNS record that verifies the domain name from which email messages are sent, thereby preventing spoofing and phishing. SPF validates the origin of email messages by comparing the sender's IP address to the alleged owner of the sending domain. It is suggested that SPF records be regenerated as TXT SPF records as they are no longer supported. From this perspective, we can claim that by their very nature, these SPF records are likewise TXT records. However, they are used specifically for email.TXT records, on the other hand, have a far broader range of applications. TXT records can also be used to publish DKIM and DMARC records, as well as to demonstrate domain ownership.
Update TXT/SPF Records
- Log in to your Domains Dashboard.

- On the dashboard, select the domain where you're updating the SPF record.
There are two views in the Domains dashboard - the Card and List views. Click on the view icons to switch to your preferred view.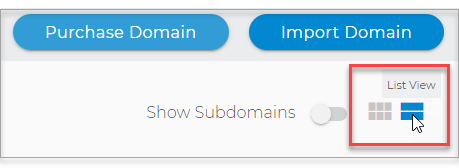
- Choose the domain you wish to modify.
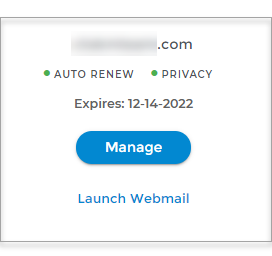
In the Card view, click the domain's Manage button.
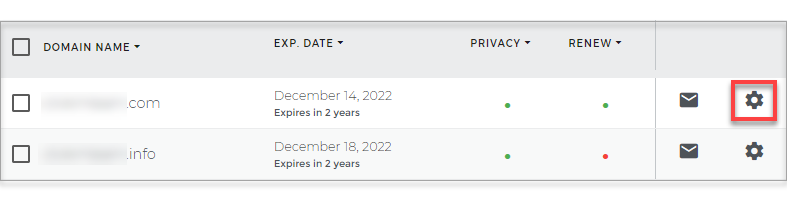
In List view, click the domain or its gear icon on the right-hand side.
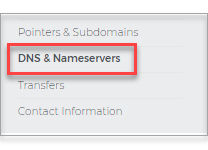
- Click on DNS & Nameservers in the left-hand menu.
- On the DNS & Nameservers page, select the DNS Records tab.
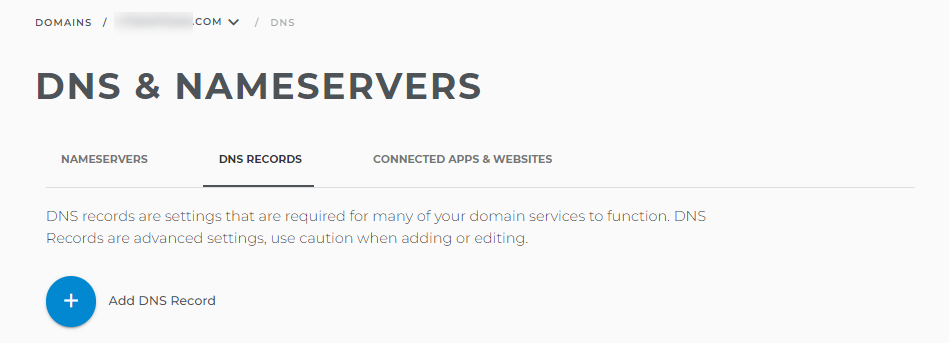
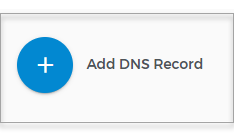
- Add a new TXT Record by clicking the blue + button.
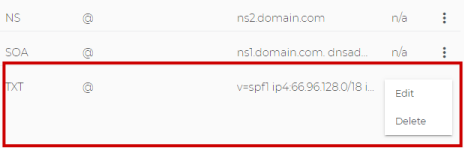
- Or, scroll to the bottom for TXT records and click on the 3 dots.
- Make your revisions and click on Update DNS.
For TXT updates using API records, please reach our customer service to assist you.
Note that DNS record changes may take 24-48 hours to take effect.
Related Articles:
How to update DNS recordsHow to update Nameservers
How to update A records
How to update MX records
