How to Update MX Records - Mail Exchange Record - DNS Management
What is an MX Record?
MX records are responsible for directing emails to the specified mail servers. They are necessary for sending and receiving emails between email addresses.
Modifying My MX Records
MX records are often modified to utilize a different email service than your hosting provider and designate personal servers as mail backups if the default mail option fails. When using our nameservers, your default MX record is your domain name which contains a local IP address to the server, so all mail is handled locally. However, this record can be modified to point to a third-party email host, or you can add additional MX records and set their priority.
Here are the steps on how to update your MX records:
- Log in to your Domains Dashboard.

- On the dashboard, select the domain name you wish to modify.
There are two views in the Domains dashboard - the Card and List views. Click on the view icons to switch to your preferred view.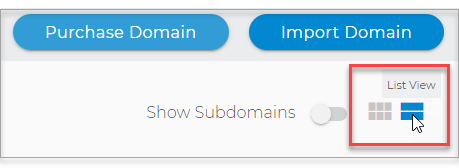
- Choose the domain you wish to modify.
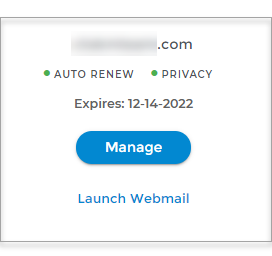
In the Card view, click the domain's Manage button.
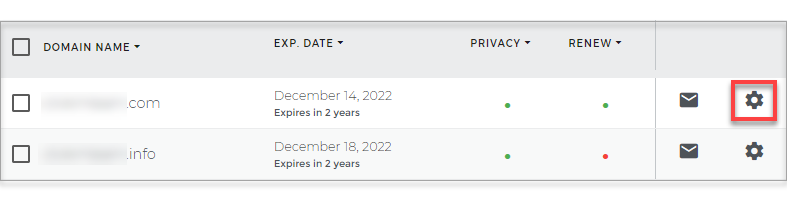
In List view, click the domain or its gear icon on the right-hand side.
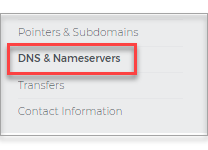
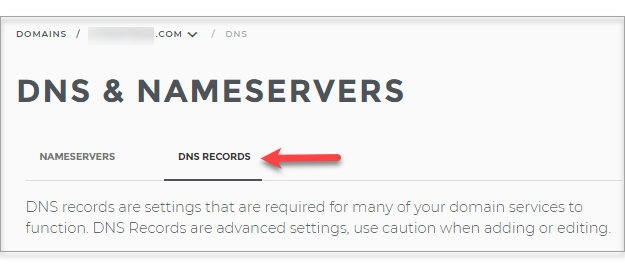
- On the left sidebar, click on DNS & Nameservers.
- On the DNS & Nameservers page, select the DNS Records tab.
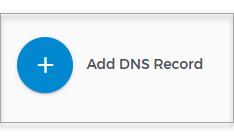
- Add a new A Record by clicking the blue + button.
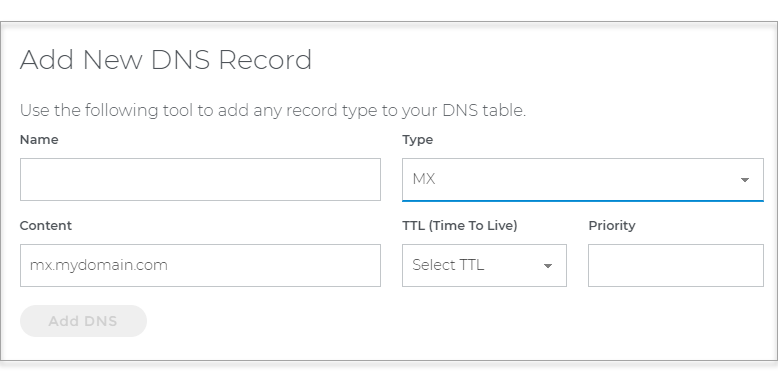
- In the window that appears, select MX record type from the dropdown list.
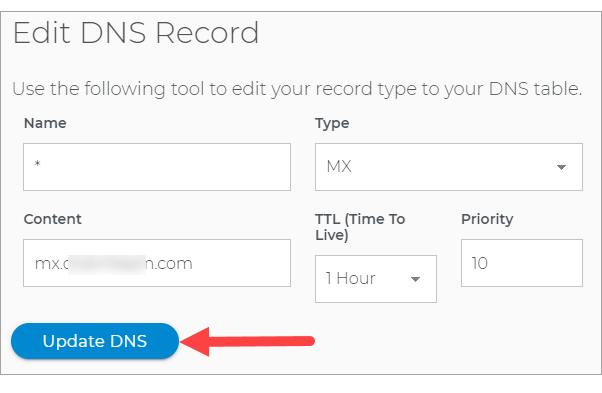
- Type in the MX record value in the content field.
- Then click on the Add DNS button.
- Or, click the three dots on the MX record you wish to edit or delete. Make sure to update both MX Records with the right format.
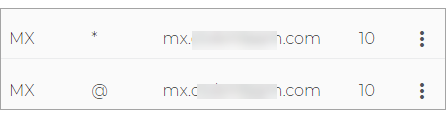
- Make your revisions and Click on Update DNS.
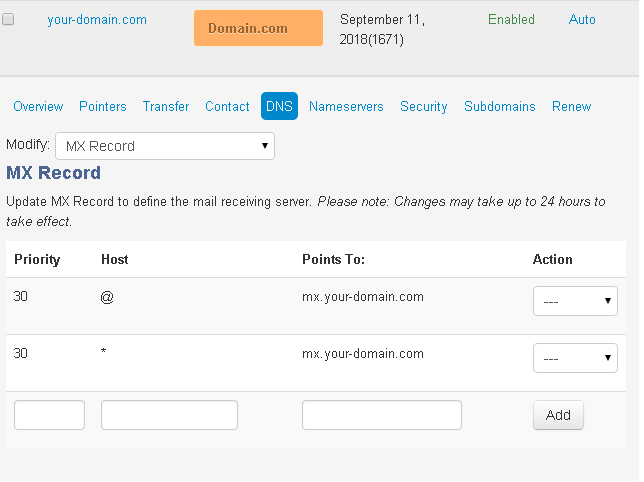
If you are viewing your dashboard through the old control panel, follow the instructions below:- Log in to your Control Panel.
- Go to Domain Central.
- Click on the domain you want to edit.
- Click DNS.
- From Modify, select MX Records.
- Enter the Priority: (the lower the number, the higher the priority; i.e., the system tries the server with priority 10 is before the server with priority 20)
- Enter Host: * and @ are wild cards. You can also set a specific host, such as POP, IMAP, SMTP, outgoing, incoming, etc.
- Points To: enter a valid domain, with a valid A Record, to which the mail will be routed
- Click Add. A confirmation message will be displayed.
- To modify a setting, select Edit or Remove from the Action dropdown menu next to the MX Record.
Note: DNS zone record changes such as A, MX, and CNAME records can typically take 0 to 4 hours to resolve but are known to take as long as 8 hours to propagate fully.MX Records FAQs
How Do I Change My MX Records To Work With Google
Important: These instructions are only applicable if you did not purchase Google Workspace through your hosting account. If you purchased Google Workspace through us, your email would be configured automatically.- Obtain the appropriate MX Record Settings from Google (see Google's help article).
- Update your MX Records with the settings provided by Google.
- Wait up to 48 hours for the changes to take effect.
How Do I Change My MX Records To Work With Another Email Provider
- Obtain the appropriate MX Record Settings from your desired email provider.
- Update your MX Records with the settings you obtained from your desired provider (see how).
- Wait up to several hours for the changes to take effect.
How Do I Host Email With Here, But Keep My Other Services Hosted Elsewhere
Make sure that your MX records are pointing to your hosting account. Work with your domain provider if you need assistance setting up your MX Records. Any changes you make could require several hours before they take effect.
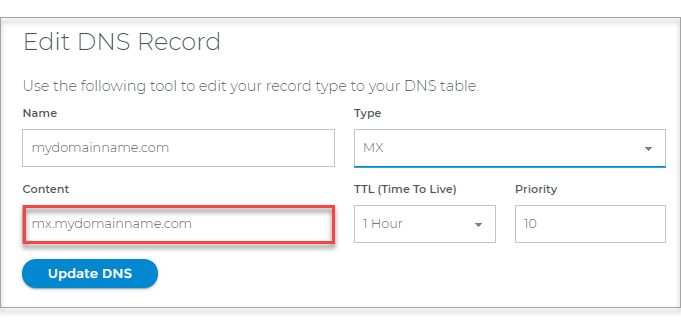
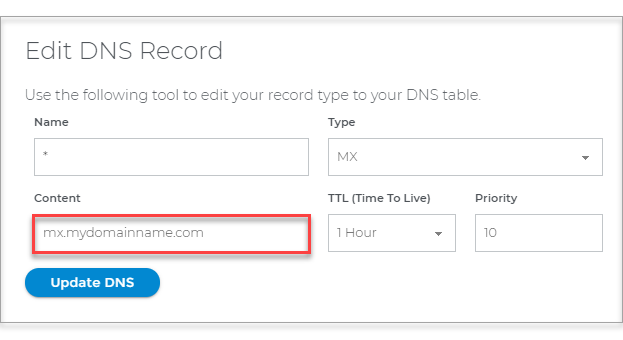
MX Record Format
If NameServers are with us, follow these two formats for the two MX Records. Make sure to change the word "domainname" with your actual domain name.

If NameServers are pointing elsewhere, you will need to contact where the NameServers are pointed to make this change.

Related Articles:
